CKEditor – WYSIWYG Editor for Web

This is a quick guide about integrating CKEditor

Download CKEditor from here – https://ckeditor.com/ckeditor-4/download/ I downloaded the full version.
Call the scripts in your code

<script src="ckeditor_full/ckeditor.js"></script>
...
...
<textarea required id="content" name="content"><?php echo strlen($content) ? $content : "" ?></textarea><br/> 
<script>
 var editor = CKEDITOR.replace('content');
 //CKEDITOR.instances['content'].setData("");
 CKFinder.setupCKEditor(editor); //see below - this is for the CKFinder and can be omitted if file uploading is not needed
</script>
...
...
...
<script> 
//validation if needed
 if(document.getElementById("content").value.length == 0)
 {
   CKEDITOR.instances[0].updateElement(); //Updates the <textarea> element that was replaced by the editor with the current data available in the editor. This is to ensure that it is updated before doing the check alert("Provide the mail body"); return false; } </script>

The above will replace the plain textarea with the CKEditor.

The number of toolbars and tools depends on the version of CKEditor (full or basic etc).

For a customizing the toolbar

CKEDITOR.editorConfig = function( config ) {
           // Define changes to default configuration here.
          // For complete reference see:
          // http://docs.ckeditor.com/#!/api/CKEDITOR.config

         // The toolbar groups arrangement, optimized for two toolbar
          rows.config.toolbarGroups = [


{ name: 'clipboard', groups: [ 'clipboard', 'undo' ] },
{ name: 'editing', groups: [ 'find', 'selection', 'spellchecker' ] },
{ name: 'links' },
{ name: 'insert' },
{ name: 'forms' },
{ name: 'tools' },
{ name: 'document', groups: [ 'mode', 'document', 'doctools' ] },
{ name: 'others' },
'/',
{ name: 'basicstyles', groups: [ 'basicstyles', 'cleanup' ] },
{ name: 'paragraph', groups: [ 'list', 'indent', 'blocks', 'align', 'bidi' ] },
{ name: 'styles' },
{ name: 'colors' },
{ name: 'about' }
];


For making the file upload and drag drop uploads working with album view

Download the CKFinder from here  https://ckeditor.com/ckfinder/download/  I used the PHP version
Call the script in the code

<script src="ckfinder/ckfinder.js"></script>

Open the config.php file (under root of the ckfinder folder) and modify the following highlighted lines with suitable values

$config['backends'][] = array(
   'name' => 'default',
   'adapter' => 'local',
    'baseUrl' => 'https://xxxxxxxxxx.com/projectname/ckfinder/userfiles/', /* note - I have used an URL but folder names and paths can be used also*/
    // 'root' => '', // Can be used to explicitly set the CKFinder user files directory.
    'chmodFiles' => 0644, //this by default was 777 I changed that to 644
    'chmodFolders' => 0755,
   'filesystemEncoding' => 'UTF-8',
);

Enable the PHP adapter (we used the default PHP adapter that comes with the CKFinder)

$config['authentication'] = function () {
   return true;  // by default this is false
};

Add the required plugins and enable them in the config.js of the CKEditor

CKEDITOR.editorConfig = function( config ) {
      // Define changes to default configuration here. For example:
     // config.language = 'fr';
    // config.uiColor = '#AADC6E';

    config.extraPlugins = 'notification';  //https://ckeditor.com/cke4/addon/notification -- required by Notification Aggregator plugin
    config.extraPlugins = 'notificationaggregator'; //https://ckeditor.com/cke4/addon/notificationaggregator  -- -- required by Upload

    config.extraPlugins = 'filetools';   //https://ckeditor.com/cke4/addon/filetools -- required by Upload
    config.extraPlugins = 'uploadwidget'; //https://ckeditor.com/cke4/addon/uploadwidget -- required by uploadimage
    config.extraPlugins = 'uploadimage'; //
};

The PHP connector comes with the CKFinder

Here are the files used above (latest versions as of time of writing)
filetools_4.11.2

notificationaggregator_4.11.2

notification_4.11.2

ckfinder_php_3.4.5

ckeditor_4.11.2_full

uploadwidget_4.11.2

uploadimage_4.11.2

Web 3D experiments with ThreeJS

Here is an experiment where a fixed background (or texture) has been used behind an interact-able 3D model. The model was created using Blender. From Blender (or any other 3D software) export the model as FBX file.

The code formatting is getting horribly misaligned when pasted here. So here is the whole folder. Run the webgl_loader_fbx2.php. Though I have included files.js, but it not needed for this experiment.

three.js-experiments — Download sample app from here.

Here is a sample 3D box created using Blender (fbx format).

PHP code for Amazon SNS Auto Subscription Confirmation (HTTPS)

Amazon Simple Notification Service or SNS is a messaging service which be used to send notifications by SMS, Email, Push notification or to a URL endpoint.

For a quick on setting up Amazon SNS see this article Amazon SNS setup for HTTPS and Email

Code for auto confirmation of subscriptions

<?php
$json_write_to_text = file_get_contents("php://input"); //read the raw data 
$json_write_to_text = json_decode($json_write_to_text, TRUE, 512, JSON_OBJECT_AS_ARRAY);

if($json_write_to_text['Type'] == SubscriptionConfirmation)
{
 $curl = curl_init();

 curl_setopt_array($curl, array(
  CURLOPT_URL => $json_write_to_text['SubscribeURL'],
  CURLOPT_RETURNTRANSFER => true,
  CURLOPT_CUSTOMREQUEST => "GET",
  CURLOPT_HTTPHEADER => $header,
 ));

 $response = curl_exec($curl);
 $err = curl_error($curl);

 curl_close($curl);
}

file_put_contents("response.txt",print_r($json_write_to_text,true)); // this is just for dumping the raw data and can be omitted 
?>


Amazon SNS setup for HTTPS and Email

Login to AWS Console

Goto Simple Notification Service

Create a Topic

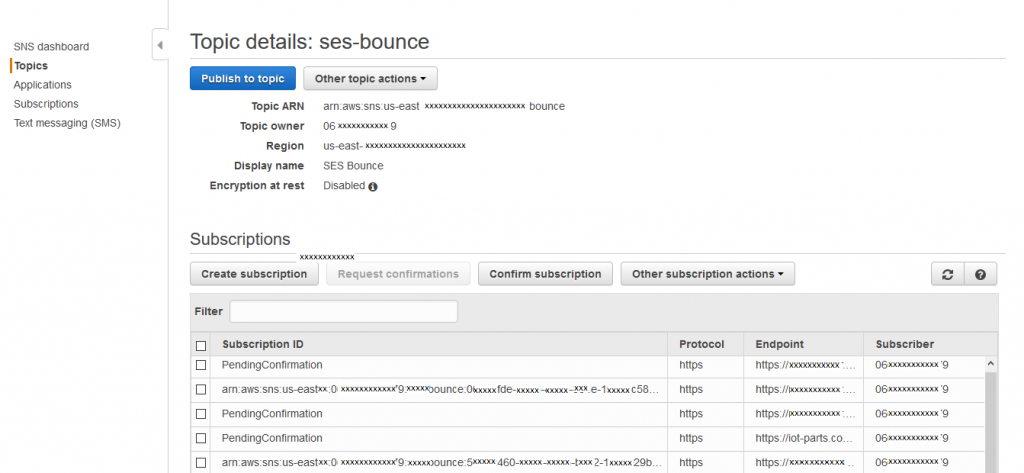
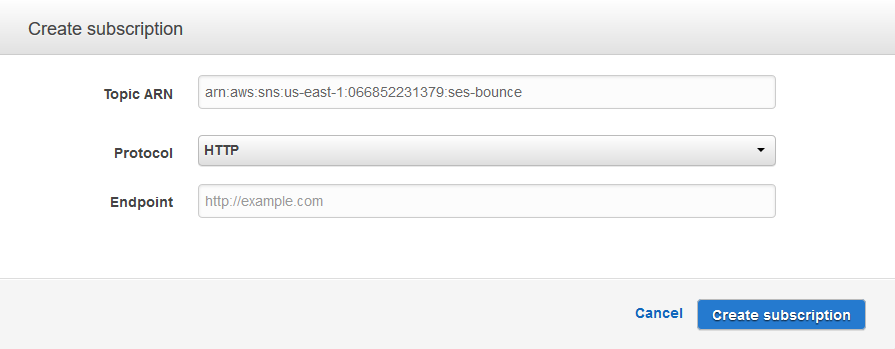
Add a Subscription – the easy and safe way to do this is by clicking the ARN of the Topic (in the topic listing page ) and going to the Topic details page.

Topic Details
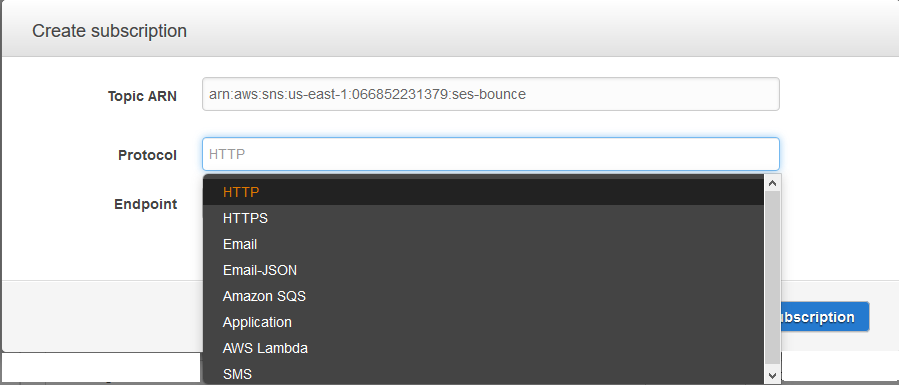
Subscription Protocols

Choose your subscription protocol (in simpler words in which way you want the notifications to be delivered)

Subscription Protocols

Amazon SNS will do a verification. The method depends on the protocol chosen. For example for emails it will send an email with a verification link, for HTTP or HTTPS it will call the endpoint with some data like below. On opening or hitting the SubscribeURL the verification will be complete.

Array
(
[Type] => SubscriptionConfirmation
[MessageId] => eeexxxea-xxxx-xxxx-xxxx-c15xxxx81361
[Token] => 2336412f3xxxxxxxxxxxxxxxxxxxxxxxxee34aadbb4eb9c926c288f8ca1xxxxxxxxxxxxcbe27c6835edd47bd28d0cf1d0cb9b4xxxxxxxx1003b95c6bc1231db657b1bb465a7d98c73a8d79faddb473a1a109c45654a1db1f11xxxxxxxxxxxxxxxxxxxf74dae61acfbe2f508901390b2cd6
[TopicArn] => arn:aws:sns:us-east-x:0xxxxxxxxxx9:xxx-bounce
[Message] => You have chosen to subscribe to the topic arn:aws:sns:us-east-x:0xxxxxxxxxx9:xxx-bounce.
To confirm the subscription, visit the SubscribeURL included in this message.
[SubscribeURL] => https://sns.us-east-1.amazonaws.com/?Action=ConfirmSubscription&TopicArn=arn:aws:sns:us-east-x:0xxxxxxxxxx9:xxx-bounce&Token=2336412f3xxxxxxxxxxxxxxxxxxxxxxxxee34aadbb4eb9c926c288f8ca1xxxxxxxxxxxxcbe27c6835edd47bd28d0cf1d0cb9b4xxxxxxxx1003b95c6bc1231db657b1bb465a7d98c73a8d79faddb473a1a109c45654a1db1f11xxxxxxxxxxxxxxxxxxxf74dae61acfbe2f508901390b2cd6
[Timestamp] => 2019-01-09T14:53:31.247Z
[SignatureVersion] => 1
[Signature] => euyT80G1NujWgQMWfltxxxxxxxxxxxxxxxiDqeicbE1FH5dwdBnAA7UY84zHf0fsJCd/xxxxxxxxxxxxxxxxxxxxxxxxx/rxx/t/wKxxxxxx/LKg2QwcjGPdnIh4xp6rNA4PKihOjMiPfTZYH4kQV+h+4zqFsQT1UL+ixlM+xBZqZY3zUV1lrHKz+SfIkPJxxxxxxxxxxIB2FN0O2leokHJYRlUqxxxxxxkMzlbsMg4ChDW8+hcJ14hNEz5kpM5T0Fqljt2CmqkF1BQ68ViTgFV7yYpcSTbejo0DuZAUxxxxxxxxxx5y340TcfTWWq+3hKSTtB9aTclgDchvLDYKNqg==
[SigningCertURL] => https://sns.us-east-x.amazonaws.com/SimpleNotificationService-ac56xxxxxxxxxxxxxxxxxxxx8aa1d9b.pem
)

Once the verification is complete the Subscription ID will show an ARN. See The Topic Details picture.

Sample PHP code for auto-verification of SNS Subscriptions for HTTP/HTTPS protocols PHP code for Amazon SNS Auto Subscription Confirmation (HTTPS)


ISPConfig PHP-FPM Session Problem

The problem I was facing – session variables not getting passed from page to page. On page1.php I set some session variables and then on going to page2.php all I was getting was Array() !  The problem drove me crazy as everything settings and permissions were fine.

I have ISPConfig 3 on Ubuntu 18.04 and PHP 7.2.

Session path, folder ownership, folder permission, cookie path everything was fine. On checking the Session folder found that the session file is getting created properly and the session variables also got saved in files properly. Also had session_start() at the beginning of every page. And there was no error or warnings. But when going to next page – nothing in session!

Then on further analysis found the issue is all about the PHPSESSID cookie being set by ISPConfig control panel. After logging out of ISPConfig panel when I opened my pages the SESSION variables got passed fine.

I spent a whole day trying to find issues with the setup or server configuration. Hope this saves someone else’s time.


ISPConfig with Jailkit – allowing custom or other commands for users

By default Jailkit allows certain commands or applications only. Below is the process to allow your users to access other commands or any custom command.

Here I wanted users to access PHP commandline and composer

  1. If needed then first install those applications normally as root
  2. Add entries for the applications/commands to the jailkit config file
    
     
    These block names will be used in ISPConfig.
    
    The folder/directories are important - else the necessary libraries and supporting files will not be copied and the application will not work properly for the users.
  3. Once the blocks have been added, the programs and all related files will have to be copied to the particular users webspace. 
    
    The jk_init command copies all files and related libraries with permissions. 
    
    jk_init -c /etc/jailkit/jk_init.ini -f -k -j /var/www/clients/clientXXX/webXXX php
    
    jk_init -c /etc/jailkit/jk_init.ini -f -k -j /var/www/clients/client1/web3 composer
    
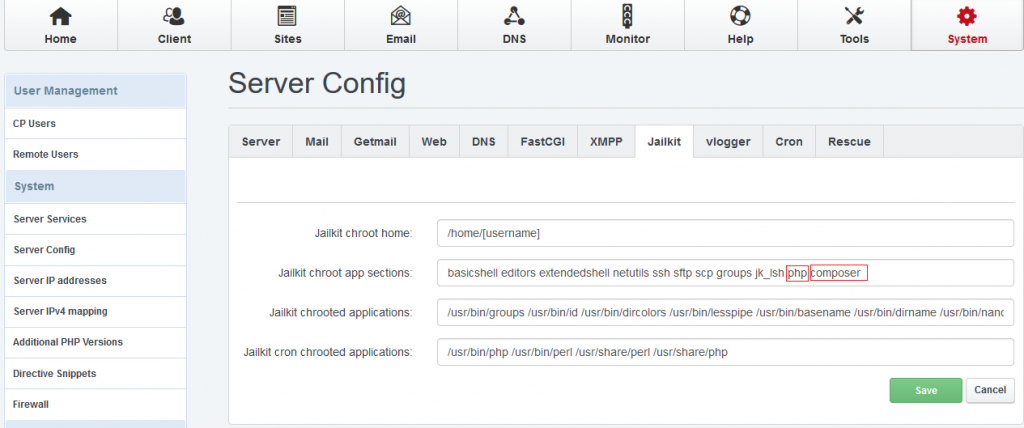
  4. After copying the files update the Jailkit section of ISPConfig - add the block names of the applications that the users will be permitted to use
    System -> Server Config -> Jailkit chroot app section


If the commands are still not accessible – then the users should try relogin first.

Check CNAME or TXT records

If the CNAME or TXT records are not displayed with normally available online tools, then they can be found using

dig TXT _axxxxxxxs.kolkataonweb.com +short
OR
dig CNAME 4xxxxxxxxxxxxxxxxxc._domainkey.kolkataonweb.com +short

(mention the keys that you want to lookup)

If everything is fine then the answer section will return the record (like below)

;; ANSWER SECTION:
xxxxxxxxxxxx 3584 IN CNAME xxxxxxxxxxxxxxxxxx

The +short can be omitted or +all can be used or nothing can be given

3.3v Low Dropout Regulator (LDO) – MCP1826 / MCP1826

MCP1826 or MCP1826S is a very simple and easy to use LDO or Low Dropout Regulator from Microchip Technology. There are both fixed voltage and variable voltage versions available. The company also makes custom chips. It’s features are:
  • 1000 mA Output Current Capability
  • Input Operating Voltage Range: 2.3V to 6.0V
  • Adjustable Output Voltage Range: 0.8V to 5.0V (MCP1826 only)
  • Standard Fixed Output Voltages:
    • 0.8V, 1.2V, 1.8V, 2.5V, 3.0V, 3.3V, 5.0V
  • Low Dropout Voltage: 250 mV Typical at 1000 mA
  • Typical Output Voltage Tolerance: 0.5%
  • Stable with 1.0 μF Ceramic Output Capacitor
  • Fast Response to Load Transients
  • Low Supply Current: 120 μA (typ)
  • Low Shutdown Supply Current: 0.1 μA (typ) (MCP1826 only)
  • Fixed Delay on Power Good Output (MCP1826 only)
  • Short Circuit Current Limiting and Overtemperature Protection
  • TO-263-5 (DDPAK-5), TO-220-5, SOT-223-5 Package Options (MCP1826).
  • TO-263-3 (DDPAK-3), TO-220-3, SOT-223-3 Package Options (MCP1826S).
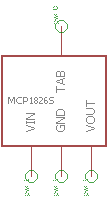
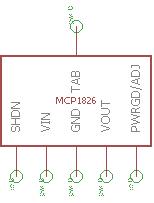
MCP1826 has  a POWERGOOD / ADJUST (depending on version) and SHUTDOWN. The MCP-1826S version is more simple and has only IN, OUT, GND                                                                      MCP-1826S                                                                    MCP-1826 Here are the Eagle files for  MCP-1826S   and    MCP-1826 Here is the Datasheet