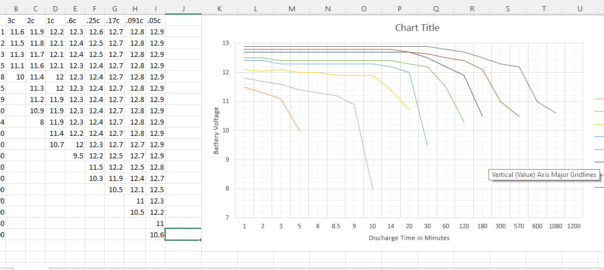
Solar panel online calculators

Free Solar Panel Calculator and Solar Power Calculator

Solar Panel Output Calculator- Estimate the Real Energy You Can Get From Your Solar Panels


https://www.renogy.com/calculators#tab_solar-size


Kolkataonweb.com doesn’t have any affiliation to the above websites. Neither Kolkataonweb.com warranties or guarantees any calculations.  You may use them as a guide to calculate solar panel and battery sizes and wattages.

Cross Origin or CORS Issue

We often get the CORS error when we try to run some code from localhost or XAMPP. The following steps will help to solve it. Please note you will need access to server side code or server configurations. 

  1. Set Access-Control-Allow-Origin to “*” in the code
  2. Set Header set Access-Control-Allow-Headers to “*” in the code 
  3. If the above didn’t work then add the same to .htaccess
  4. If still not solved then set the same in Apache / HTTPD configuration

In my case setting it in the code didn’t work. So it set it in the .htaccess but it also didn’t work. I was getting the error “Reason: header ‘access-control-allow-headers’ is not allowed according to header ‘Access-Control-Allow-Headers’ from CORS preflight response“. The point to note is CORS Preflight. Which indicated that the error happened before the request reached the code. So I thought to set it in Apache config and it worked.

In my case the server had ISPConfig, so I set it through ISPConfig instead of changing the actual Apache configuration file.
The configuration needs to be put under “Sites” -> “<Site Name>” ->  “Options” -> “Apache Directives”.
The exact lines to be put
Header set Access-Control-Allow-Origin “*”
Header set Access-Control-Allow-Headers “*”


ESP-8266 and NTP = onboard timekeeping

We can sync the time of a ESP-8266 with a NTP server and then keep time count on the device. It will not need any other additional devices like a DS1307 clock. And once synced with the NTP server it can keep the time even if there is no internet  – very handy.

The time formatting and display functions are standard C++ functions.

#include <ESP8266WiFi.h>

#include "TinyDHT.h"

const char *ssid     = "xxxxx";
const char *password = "xxxxxx";


#define DHTPIN11 14          // What digital pin we're connected to
#define DHTTYPE11 DHT11     // DHT 11

DHT dht11(DHTPIN11, DHTTYPE11);

struct tm* tm;

float temperature, relHumidity;
String currentTime;

#define countof(a) (sizeof(a) / sizeof(a[0]))

#define LED 13

void setup() {

  time_t now = 0;

  // Initialize serial and wait for port to open:
  Serial.begin(9600);
  // This delay gives the chance to wait for a Serial Monitor without blocking if none is found
  delay(1500); 

  Serial.print("Connecting to ");
  Serial.println(ssid);
  WiFi.mode(WIFI_STA);
  WiFi.begin(ssid, password);
  while (WiFi.status() != WL_CONNECTED) {
    delay(500);
    Serial.print(".");
  }
  Serial.println("");

  Serial.println("WiFi connected");
  
//sync time with the NTP server. First param 19800 seconds = +5:30 for IST, Second Param 0 = DST 
 configTime(19800, 0, "pool.ntp.org");

//waiting for time to get synced before proceeding. This is not strictly required. Please see after code 
  do
  {
    now = time(nullptr);
    delay(500);
    Serial.print("*");
  }while(now < time(nullptr));
  
  pinMode(LED, OUTPUT);
  
  pinMode(DHTPIN11, INPUT);
  dht11.begin();

  onLedIndicatorChange();
}


void loop() {
  // Your code here 
  time_t now = time(nullptr);
  
  char datestring[30];
  
  strftime(datestring, 
            countof(datestring),
            "%d/%m/%Y %I:%M:%S %p",
            localtime(&now)
            );
   
  currentTime = datestring; 
  Serial.println(currentTime);
  temperature = dht11.readTemperature();
  delay(200);
  relHumidity = dht11.readHumidity();
  delay(200);

}

void onLedIndicatorChange() {
  // Do something
  int ledIndicator = 1; 
  digitalWrite(LED, ledIndicator);
}

configtime listens for connection in the back and will sync as soon as a connection is available. So if a time is not critical for the successive codes or functions then the loop that waits for the sync can be skipped.

configTime(19800, 0, "pool.ntp.org");
do //loop and wait for a sync
{
  now = time(nullptr);
  delay(500);
  Serial.print("*");
}while(now < time(nullptr));


Sync Ds1302 with NTP

This code first syncs the DS1302 chip with a NTP server and then reads time from the DS1302 chip. Every time the system is booted the clock is synced with a NTP server.

#include <ESP8266WiFi.h>

#include "TinyDHT.h" // Adafruit library https://github.com/adafruit/TinyDHT

#include <ThreeWire.h> // needed by rtc
#include <RtcDS1302.h> // Makuna library https://github.com/Makuna/Rtc

const char *ssid     = "xxxxxxxxxxxx";
const char *password = "xxxx";


#define DHTPIN11 14          // Pin to which DHT11 connected to
#define DHTTYPE11 DHT11     // DHT 11

DHT dht11(DHTPIN11, DHTTYPE11);

ThreeWire myWire(5,16,4); // IO, SCLK, CE/Reset
RtcDS1302<ThreeWire> Rtc(myWire);
RtcDateTime currentTimeEpoch;

#define countof(a) (sizeof(a) / sizeof(a[0]))

float temperature, relHumidity;
String currentTime;

void initialiseRTC()
{
    //now = time(nullptr);
    //Serial.print(now);
    
    /*if (!Rtc.IsDateTimeValid()) 
    {
        // Common Causes:
        //    1) first time you ran and the device wasn't running yet
        //    2) the battery on the device is low or even missing

        Serial.println("RTC lost confidence in the DateTime!");
        //by default the RTC library assumes time from year 2000, but EPOCH starts from 1970. Severs returns EPOCH and that is the standard. So below converting the EPOCH to equivalent RTC date.   
        currentTimeEpoch.InitWithEpoch32Time(time(nullptr));
        Rtc.SetDateTime(currentTimeEpoch);
    }*/

    if (!Rtc.GetIsRunning())
    {
        Serial.println("RTC was not actively running, starting now");
        Rtc.SetIsRunning(true);
    }

    if (Rtc.GetIsWriteProtected())
    {
        Serial.println("RTC was write protected, enabling writing");
        Rtc.SetIsWriteProtected(false);
    }

    //here we are always syncing the clock when the device is booted. 
    currentTimeEpoch.InitWithEpoch32Time(time(nullptr));
    Rtc.SetDateTime(currentTimeEpoch);
    
    if (!Rtc.GetIsWriteProtected())
    {
        Serial.println("RTC was not write protected, disabling writing");
        Rtc.SetIsWriteProtected(true);
    }

}

#define LED 13

void setup() {
  time_t now = 0;
  // Initialize serial and wait for port to open:
  Serial.begin(9600);
  // This delay gives the chance to wait for a Serial Monitor without blocking if none is found
  delay(1500); 

  Serial.print("Connecting to ");
  Serial.println(ssid);
  WiFi.mode(WIFI_STA);
  WiFi.begin(ssid, password);
  while (WiFi.status() != WL_CONNECTED) {
    delay(500);
    Serial.print(".");
  }
  Serial.println("");

  Serial.println("WiFi connected");
  
// here we are setting up the NTP call. Consequently we can just call time() to get the time. 
//the first parameter is Timezone in seconds, second parameter is DST in seconds and third parameter is the NTP server. 
  configTime(19800, 0, "pool.ntp.org"); 

//wait till the clock is synced, else wrong time will get set in the DS1302 chip 
  do   
  {
    // time(nullptr) - returns the time that was received from NTP server
    now = time(nullptr);
    delay(500);
    Serial.print("*");
  }while(now < time(nullptr));

  Rtc.Begin(); //initialise the RTC library
  initialiseRTC(); // this will set the NTP time in DS1302 clock chip,
  
  pinMode(LED, OUTPUT);
  
  pinMode(DHTPIN11, INPUT);
  dht11.begin();

  onLedIndicatorChange();
}

void loop() {
  // Your code here 
  RtcDateTime now = Rtc.GetDateTime(); // reading the time from DS1302 clock module
  char datestring[20];
  
  snprintf_P(datestring, 
            countof(datestring),
            PSTR("%02u/%02u/%04u %02u:%02u:%02u"),
            now.Month(),
            now.Day(),
            now.Year(),
            now.Hour(),
            now.Minute(),
            now.Second() );
   
  currentTime = datestring; 
  Serial.println(currentTime);
  temperature = dht11.readTemperature();
  delay(200);
  relHumidity = dht11.readHumidity();
  delay(200);

}

void onLedIndicatorChange() {
  // Do something
  int ledIndicator = 1; 
  digitalWrite(LED, ledIndicator);
}

Apple In-app Purchase and App Rejections

Developers and app owners often have doesn’t have clear view on where in-app purchase is must and when other payment gateways are allowed in their iOS App. Confusions often lead to app rejection.

Apple has clear guidelines (read rules) on when in-app purchase is must and when other payment gateways are allowed.

Here I am putting which kind of payments can be taken through third party gateways. It is an exact excerpt from the full Apple guidelines

3.1.3 Other Purchase Methods: The following apps may use purchase methods other than in-app purchase. Apps in this section cannot, either within the app or through communications sent to points of contact obtained from account registration within the app (like email or text), encourage users to use a purchasing method other than in-app purchase.

3.1.3(a) “Reader” Apps: Apps may allow a user to access previously purchased content or content subscriptions (specifically: magazines, newspapers, books, audio, music, and video). Reader apps may offer account creation for free tiers, and account management functionality for existing customers.

3.1.3(b) Multiplatform Services: Apps that operate across multiple platforms may allow users to access content, subscriptions, or features they have acquired in your app on other platforms or your web site, including consumable items in multi-platform games, provided those items are also available as in-app purchases within the app.

3.1.3(c) Enterprise Services: If your app is only sold directly by you to organizations or groups for their employees or students (for example professional databases and classroom management tools), you may allow enterprise users to access previously-purchased content or subscriptions. Consumer, single user, or family sales must use in-app purchase.

3.1.3(d) Person-to-Person Services: If your app enables the purchase of realtime person-to-person services between two individuals (for example tutoring students, medical consultations, real estate tours, or fitness training), you may use purchase methods other than in-app purchase to collect those payments. One-to-few and one-to-many realtime services must use in-app purchase.

3.1.3(e) Goods and Services Outside of the App: If your app enables people to purchase physical goods or services that will be consumed outside of the app, you must use purchase methods other than in-app purchase to collect those payments, such as Apple Pay or traditional credit card entry.

3.1.3(f) Free Stand-alone Apps: Free apps acting as a stand-alone companion to a paid web based tool (eg. VOIP, Cloud Storage, Email Services, Web Hosting) do not need to use in-app purchase, provided there is no purchasing inside the app, or calls to action for purchase outside of the app.

Except the above mentioned cases all other payments will have to be in-app purchases.

A few more things on in-app purchases

  1. The purchase screen, must have the Item Name, Description, Benefits and Price clearly mentioned.
  2. In case of subscriptions the time duration must be clearly mentioned.
  3. The Item Name and Price must match with that defined in the app store.
  4. On the screen where the Payment button is there, or before the user can initiate the payment process, he/she should be shown a few texts. Below are some guidelines only, it should be properly phrased
    1. Payment will be charged to iTunes account
    2. The purchase will renew or not
      Example text for auto renewal subscriptions – Subscription will automatically renew for the same time length for the same price until it is cancelled in iTunes store at least 24 hours prior to the end of the current period.

      Example text for Consumables – This is a consumable product and doesn’t require any renewal.
    3. When the account will be charged
      Account will be charged for renewal of Subscriptions within 24 hours prior to the end of the current period with the same price 
      – this is required in case of auto renewing subscriptions.
      This consumable doesn’t have any validity period or expiry date — For Consumables.
    4. Links to app’s Privacy Policy and Terms & Conditions.

Submit the in-app items while submitting the app for review.

Here is the full guidelines of Apple – https://developer.apple.com/app-store/review/guidelines/#in-app-purchase . Somehow this link is not returned in searches easily.

The above thing can be done for the Android version also.

FFMPEG Rotating Video – Transpose vs Rotate

FFMpeg can be used to rotate a video or change the video orientation. There are two ways to do that – Transpose and Rotate.

But there is a difference – with Transpose the whole video gets rotated (as is expected to happen) but with Rotate the video gets cropped to fit the existing height of the video and on the sides black border will appear.

ffmpeg -y -i INPUT.mp4 -c:v libx264 -crf 23 -acodec copy -vf "transpose=1" -metadata:s:v rotate=0 -movflags +faststart OUTPUT.mp4

transpose=1 will rotate the video clock-wise by 90 degrees.
ffmpeg -y -i INPUT.mp4 -c:v libx264 -crf 23 -acodec copy -vf "rotate=PI/2" -metadata:s:v rotate=0 -movflags +faststart OUTPUT.mp4

rotate=PI/2 will also rotate the video clock-wise by 90 degrees but the resultant video will get cropped.

Media Streaming (MP4 file streaming) with Apache2

#wget http://h264.code-shop.com/download/apache_mod_h264_streaming-2.2.7.tar.gz

#tar -zxvf apache_mod_h264_streaming-2.2.7.tar.gz

#cd /apache_mod_h264_streaming-2.2.7

#./configure –with-apxs=`which apxs2`

#make

#make install

#LoadModule h264_streaming_module /usr/lib/apache2/modules/mod_h264_streaming.so

#AddHandler h264-streaming.extensions .mp4

#service apache2 restart

The file is attached below in case the main link goes down. The link to the original download location :  http://h264.code-shop.com/download/

Working on Apache/2.4.41 (Ubuntu) on day of writing.


apache mod h264 streaming v2.2.7

Google FCM all Push Notification parameters

All Firebase Push Notification parameters are available from the Google API test console. The direct link to the Send method test console – https://firebase.google.com/docs/reference/fcm/rest/v1/projects.messages/send

From the above URL other details can be navigated to.

To open the console click on the “Try it!” blue button on right.

Now clicking the blue dots in the basic JSON  will show the relevant params of that section.